[JIRA] Granting a permission to a user so it can see only assigned projects and nothing else


Apr 20, 2020
•
7 min
•
Sep 30, 2025

Written by: Andris Blaus
Think about a situation when you have multiple projects with different issues, etc, and a client wants to follow the process in JIRA application for his project but when the client is added to JIRA he has access to all of the company's projects and information within those projects. Now that would be really bad and endangers confidentiality. It must be fixed so the client has access to only his project. Also the client must have correct permissions otherwise that could lead to mistakenly editing the project structure.
Steps to take:
A) Create a group;
B) Create a project role;
C) Create a permission scheme;
D) Add the created permission scheme to the project;
E) Add people and project roles to the project.
- Create a group:
Definition:
- A Jira group is a convenient way to manage a collection of users. You can use groups throughout Jira to allow application access. Grant global permissions or project specific access.
Project roles vs Jira Groups:
- Their main difference is that Project Roles are project-specific while groups are global across the JIRA application.
This is important as it makes a big difference when you are going to edit permissions for a project. For example if you will add a group for a permission “browsing projects” (which gives the ability to browse projects and the issues within them) then this group will have access to all projects because this is going to be a global across the JIRA application. As stated above “Groups are global across the JIRA application”. Altho if you set a project role for the same example “browsing projects” then only that set project role is going to have access to that project.
Steps to create/edit group:
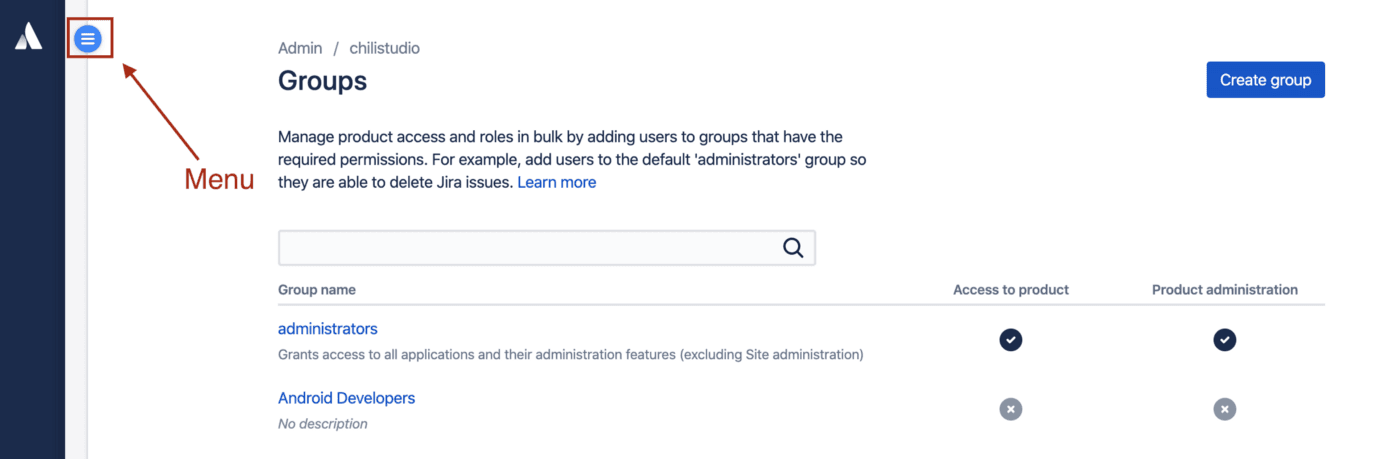
- Login as administrator at — admin.atlassian.com;
- Go to “User Management” and find “Groups”. You can find this at the menu selection;
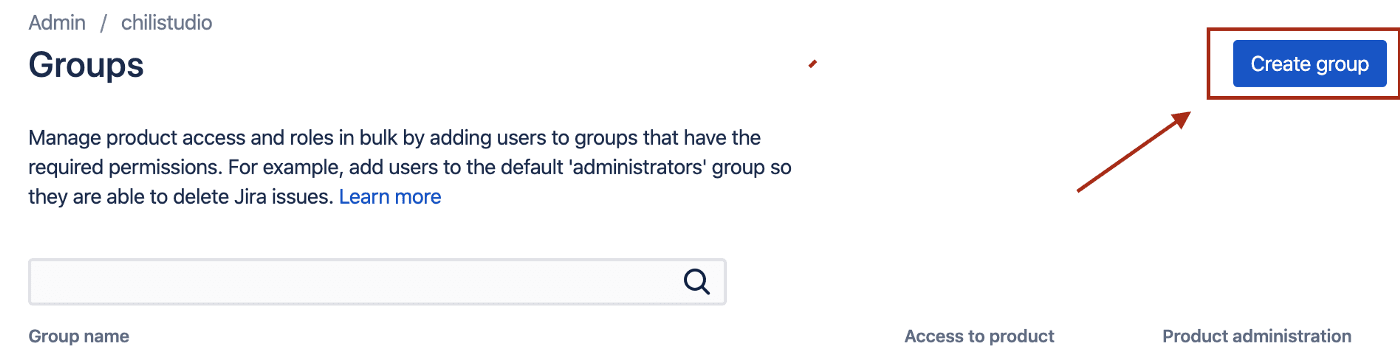
- Create a group in which you can add specific people (this is a is a suitable way to manage a collection of users). For example create a group for client and his project.
- Next when a group is created you must add people to it. Simply access the created group and click on “add members”. For example, I am going to add the client to my created group.
After this we can move onto the next step.
- Create a project role:
Definition:
- Project roles are a flexible way to associate users and/or groups with particular projects. Project roles also allow for delegated administration.
For example, “Jira Administrator” as a role can — analyse, review, and document current functionality to determine potential areas of improvement. Manage user permissions for tools according to the needs of projects and teams. Perform application and system administration tasks, including data backups and scheduled jobs.
Project roles vs Jira Groups:
- Their main difference is that Project Roles are project-specific while groups are global across the JIRA application.
Steps for creating/editing a project role:
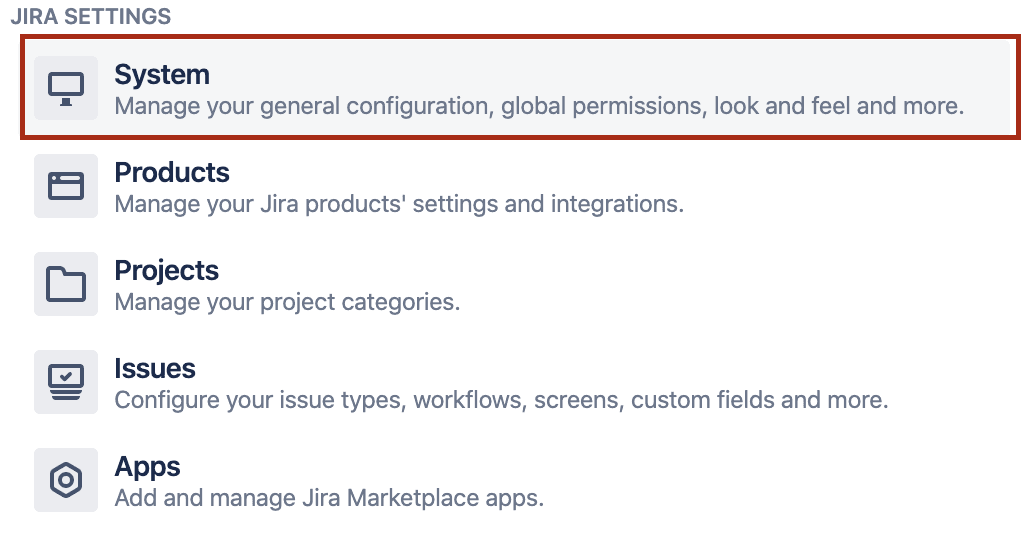
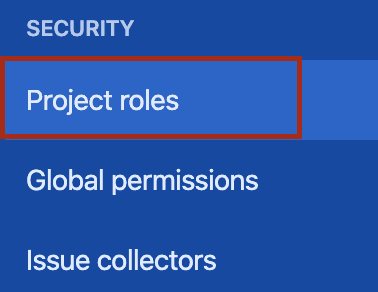
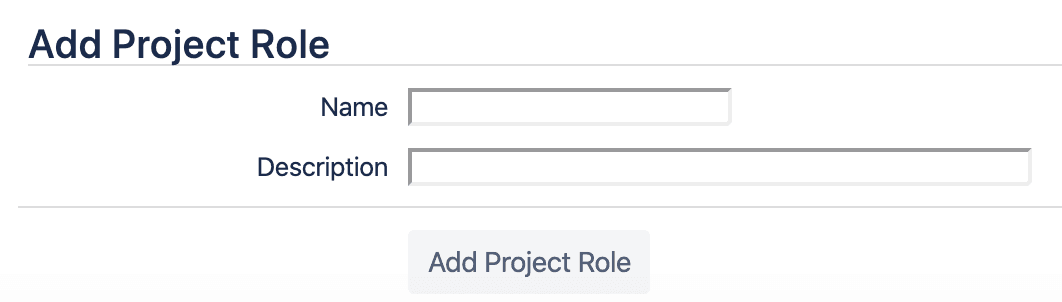
- Go to “Jira settings”>”System”>”Project Roles”
- At the bottom of the page you can “Add Project Role”. Simply write a “Name” for the role and add a description for it. For example I wrote something like “Name — Client” and “Description — Permissions for one project only to client”
This is what we are going to use in the next step.
- Create a Permission Scheme:
Definition:
- The permission scheme dictates all the permissions in the projects it’s associated with.
Steps for creating/editing Permission Scheme:
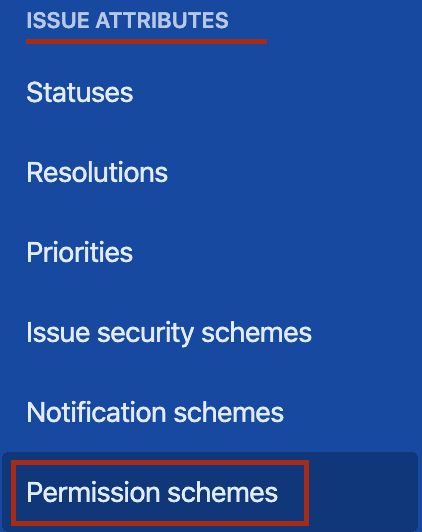
- Go to “Settings”>”Issues”>”Issue Attributes”>”Permission Schemes”
- To make life easier you can just copy an already existing permission scheme so you can only edit the necessary fields and not adding every single field. This is going to create a copy of already existing permission scheme so you can just edit it.

- After that you can just clink on “edit” and “Permissions” on the copied Permission scheme.

- By clicking on “edit” for the created/copied scheme you can change the “Name” and “Description” for it.
- By clicking on “Permissions” you can see all the available permissions for specific actions.
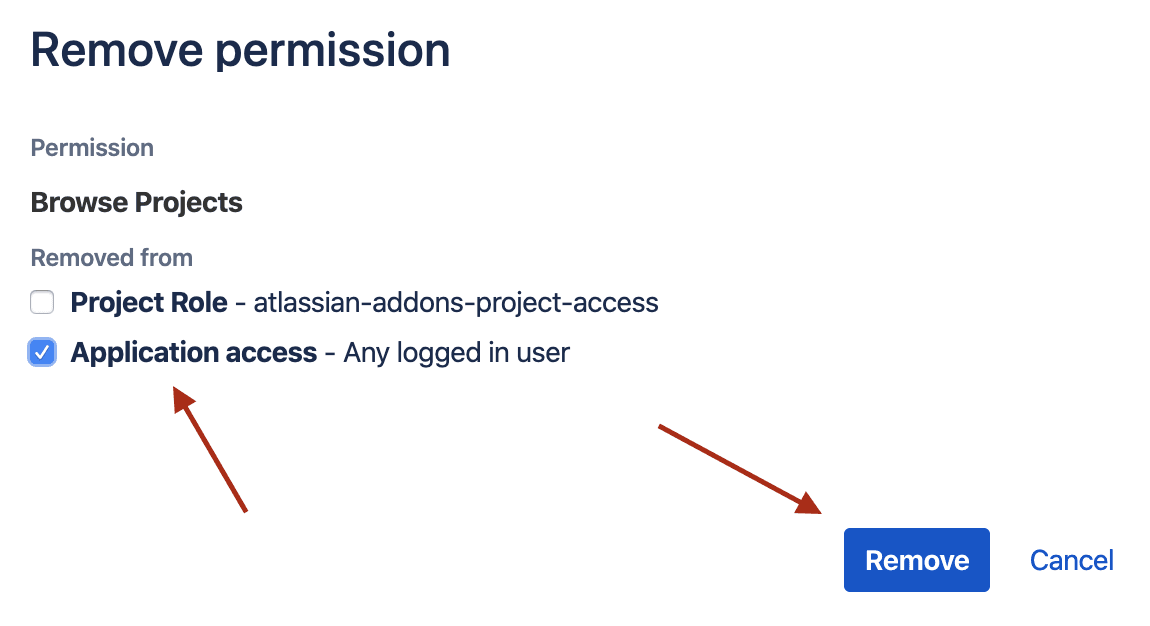
- Click on “Permissions” and search for “Browse Projects” and click on “Remove”. We need to remove “application access — any logged in user” because this would enable a situation when any logged in user has the ability and access to see the project and all information within it.

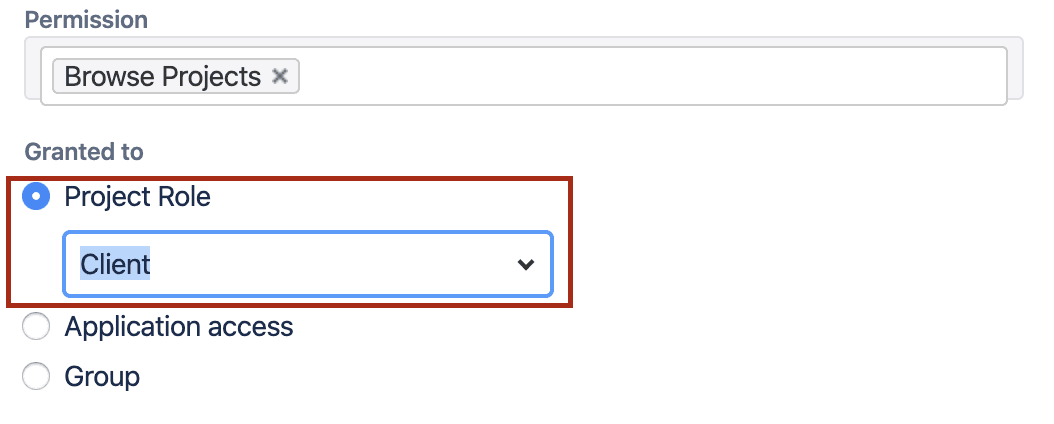
- Now go back to field “Browse projects” click on “edit” and add the created role at “Project Role”. This is going to enable ability to browse projects and the issues within them for the added project role.
- This is also why you need to remember why we are adding a “Project role” and not a “Group” as it was explained above with the difference between those two things.
Do the same with all the permission fields in which you find necessary to remove/add people.
With the next step we need to add this Permission Scheme to the project.
- Add Permission Scheme to a project.
Steps for adding Permission scheme to a project:
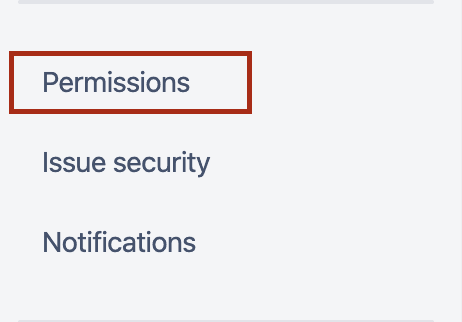
- go to your selected project and at “Project Settings” find ''Permissions''.
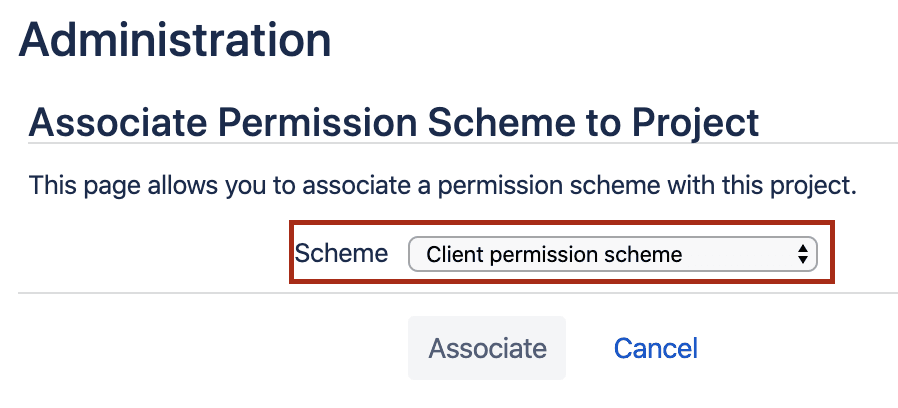
- On the right side of top of the page click on “Actions” and “Use a different scheme”.

- Now find your created scheme and click on “Associate”. This will replace the current Permission Scheme with your chosen one.
Now all we have to do is to add the previous created group to the project.
- Add Group to the project:
Steps for adding a group to the project:
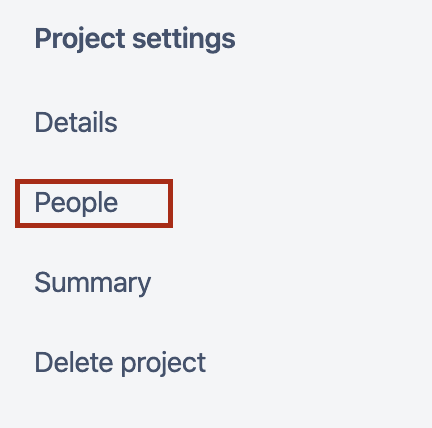
- Go to your project and at “Project Settings” find “People”.
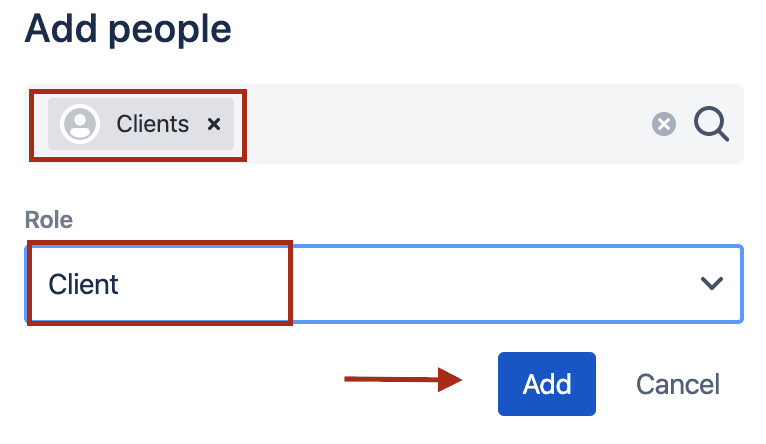
- At the right side of top of the page click on “Add People”.
- Now just find your created group and select your created role for the client.
That is it! You have done it! Now everything should work and if you want to you can check it out if it works correctly. Make sure to read “Bonus” part bellow regarding on how to test it out in an easy way.
Bonus: how to check people permissions
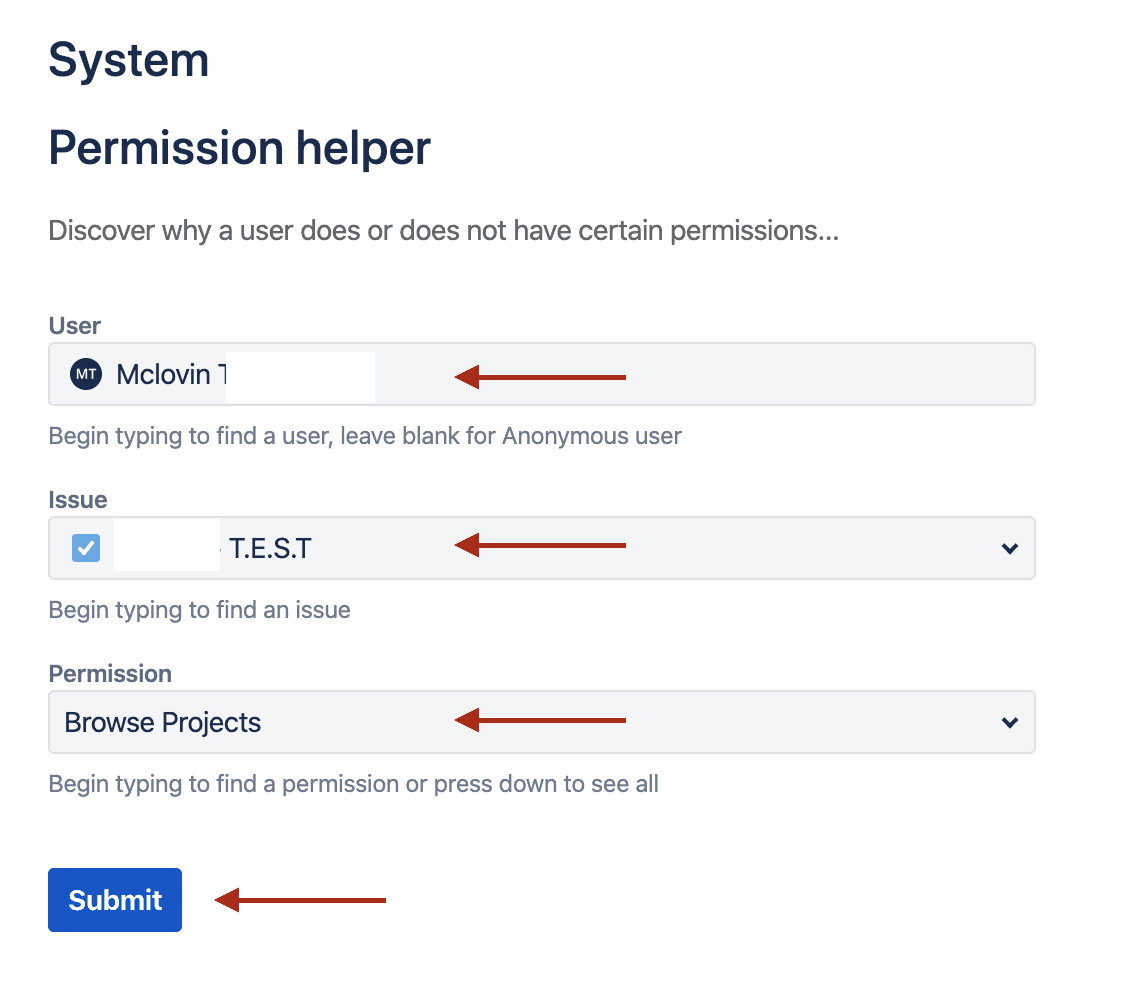
Steps to check people application permissions:
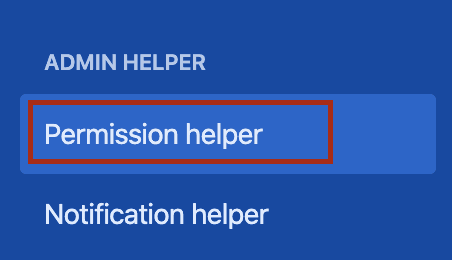
- Go to “Jira Settings”>”Admin Helper”>”Permission Helper”
- Here you can check permissions for people (like if they have specific accesses).
- As an example I wrote projects client in “User”, one issue from clients project and the permission to “Browse Projects”. Click on “Submit” and see the results.
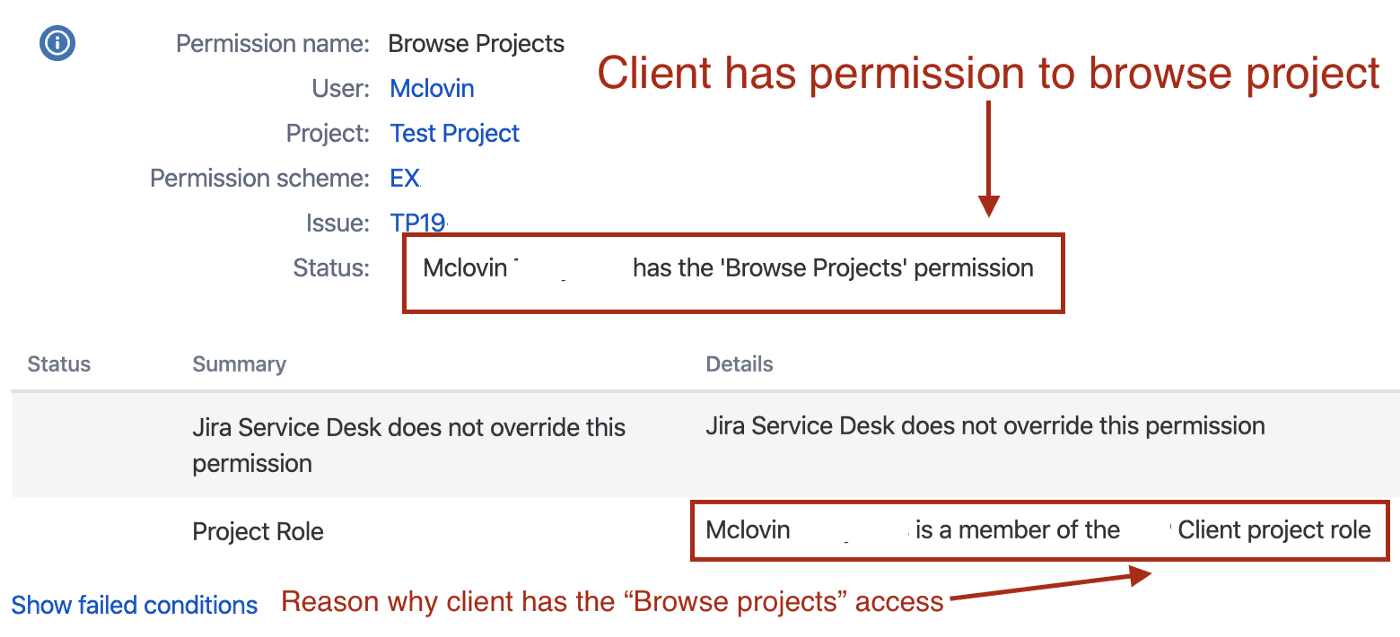
- In result everything works fine. Client has permission to browse his project because he is a member of the “Client project role”. (The created permission scheme is added to the project and at the project we added him at people section with the created project role)
Conclusion:
JIRA can get complicated and still this can be updated with newest patches to make this process easier. For now you can use this guide to find a solution to your problem regarding issues with permissions and projects.
If you followed these steps then everything should work just fine and you have successfully restricted access for users in JIRA.
Thank you for reading this article! There might be other ways to make this possible, feel free to add any comments/suggestions related to this topic. :)
Follow and read related stories at www.chililabs.io